It’s not only businesses that are impacted by the changes in the way we work and use technology as a result of the pandemic – educators have also adapted to a changing world. In a teaching environment, you have to now be prepared for changes at short notice: lots of education is back in the classroom but home schooling is still prominent, especially for those who have to self-isolate, so being able to utilise technology, you can ensure workflows are streamlined and ensure students are comfortable and confident.
Check out the amazing new features as part of Microsoft 365 for Education, that can help you out!
Breakout rooms in Teams
If you’re holding a lecture/class with students, sometimes it can be difficult to have an open discussion or exchange ideas – particularly as it can be daunting as a student raising a hand in a large group. Breakout rooms allow people to gather in small groups to brainstorm or talk through ideas, run mini quizzes or start projects.
There are different ways to set up breakout rooms and assign people – both automatically and manually.
To be able to create breakout rooms, you must be a meeting organiser/presenter who has been appointed a breakout rooms manager.
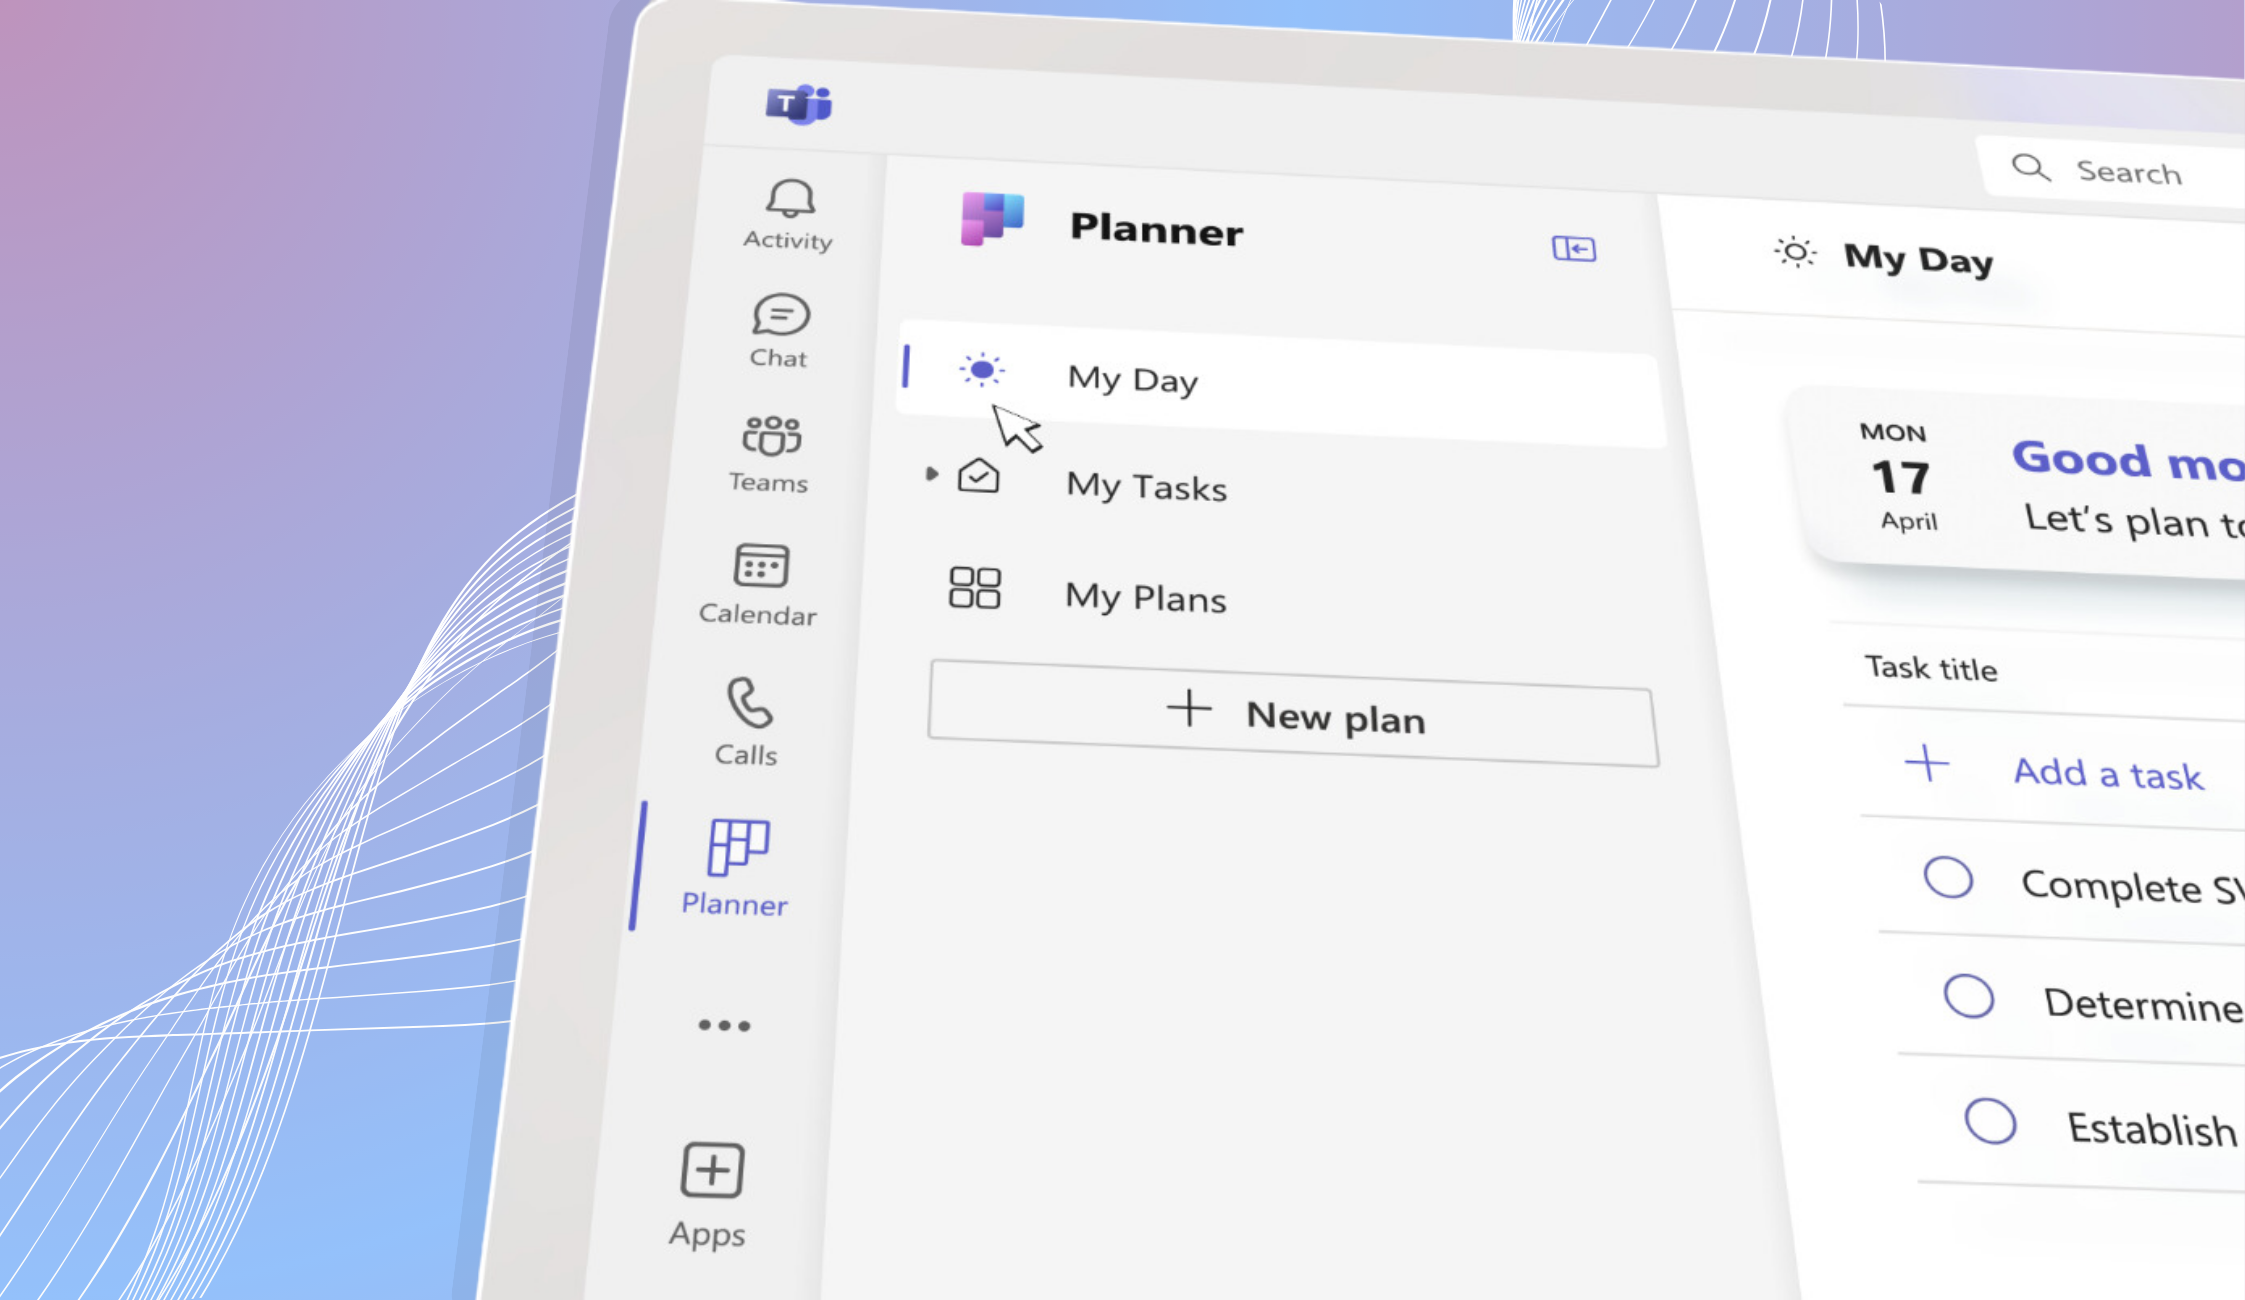
You can create breakout rooms and assign people when you set up the meeting. Or you can edit the meeting invite and create them before the meeting starts – just open the invite, go to breakout rooms, select ‘Create rooms’ and choose how many you want (up to 50) and select ‘Add rooms’.
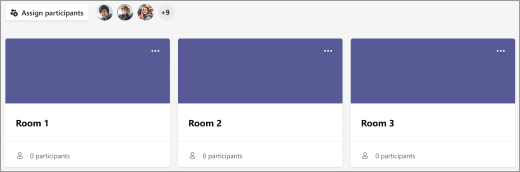
Then select ‘Assign participants’ and select whether Microsoft Teams will automatically assign people, or choose them yourself.
You can also create breakout rooms during the meeting – just head to meeting controls and select ‘Breakout rooms’ and follow the same steps as above.
![]()
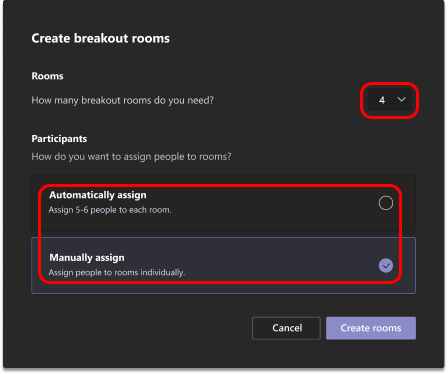
To assign people manually, simply click ‘Manually assign’ and tick the box next to individuals names for each breakout rooms.
Learn more about the ins and outs of breakout rooms here.
Rehearse a slideshow presentation
Within PowerPoint, you now have the option to rehearse with a Speaker Coach – this allows you to practice a presentation in advance and in private so you can ensure you are as prepared as possible.
The coach evaluates the pace of your speech, your pitch, your use of filler words (such as ‘umm’), informal speech, euphemisms and culturally sensitive terms. It also lets you know if you are being overly wordy or reading the text from a slide.
Every time you rehearse, you will get a report that includes statistics and suggestions for improvements.
You can do this as many times as you want until you feel prepared. This software is only currently available in English.
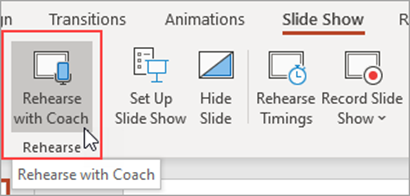
To access this software, if you are in the desktop app, open the ‘Slide Show’ tab and select ‘Rehearse with Coach’. The presentation will open in full-screen view. Make sure you are close enough to your microphone, or use headphone microphones, so it can hear you properly.
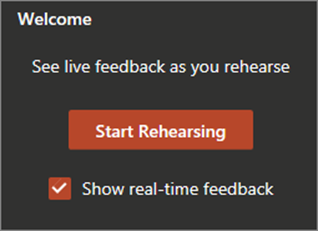
At the bottom of the screen you will see a box appear with a ‘Start Rehearsing’ button, click this once you are ready and it will start ‘Listening’. If you would like real-time feedback, ensure the box is ticked.
If real-time feedback is on, the coach can give you guidance on how fast you are talking, will flag if you use a swear word, notes if you are using filler words.

Once you get to the end and exit the slide show, the rehearsal report will pop up to summarise everything and suggest ways to improve. You can click ‘Learn More’ to find more on the recommendations.
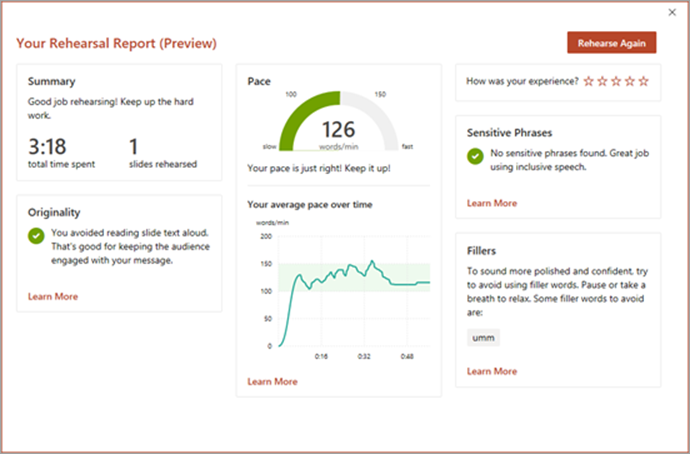
You can select rehearse again as many times as you need to perfect the presentation. The more you use it, the more it begins to learn about you and provide more refined suggestions.
Read more about it here.

Scan documents through your phone
As an educator, you may often need to scan a document – perhaps a permission slip, a group of ideas you wrote up, or a document you would like to share amongst your students. You can use your mobile device to not only scan documents, but also whiteboards and business cards directly in the OneDrive app.
All you have to do is open up the app, tap the ‘Scan’ icon and select what collateral you’re scanning and tap the white circle to scan it:

There is the option to scan multiple pages at once, which allows you to combine a group of scans into one PDF – just tap ‘Add’ and scan the next document. If you don’t like the image (maybe it is blurry), you can press the back arrow and try again.
If you need to sign the scan, or draw on it, select the pen icon and select the relevant colour.
Once everything is finalised, tap ‘Done’ (iOS) or the checkmark (Android), give it a name and click save/checkmark. It will be saved to your OneDrive and you can now share it amongst your students or other educators.
You can read more about this and download OneDrive here.
To check out all the new features in the Microsoft 365 for Education update, click here.
Want to learn more about the benefits of Microsoft 365 for Education and how we can help you be your best? Or do you want to keep updated with the latest Microsoft Teams updates? Email us at [email protected] or fill out the form below.
Share
Related Posts
Our most recent articles
11 April 2024
04 April 2024
21 March 2024